
Adding access to the bench seats of a travel trailer dinette is a practical modification that can improve the functionality of your space by making it easier to access under-seat storage. Having to lift the cushions to access the storage can become very tedious, especially with the table in the way
Here is what I did for adding access to the storage in the bench seats at dinette of my 16BH:
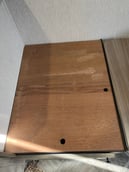
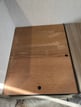
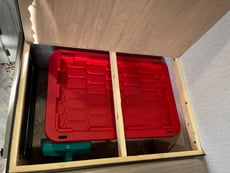
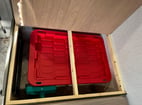
1. Access from Above
I purchased my trailer new, and I found that the panels under the seat cushions to be very rough. The first thing I did was sand all the surfaces so that they were smooth without the possibility of getting splinters. There was only one finger hole in the middle. I added an additional finger hole at the aisle for easier access. I made sure to sand both holes to avoid getting cut from the rough edges.
Benefits:
No need to cut or alter the furniture significantly.
The cushions stay in place when not being accessed, giving a clean look.
Offers simple access to the storage beneath.

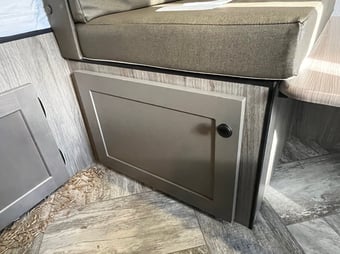
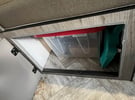
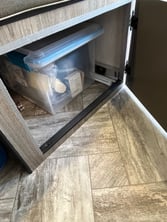
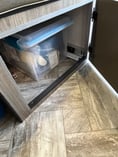
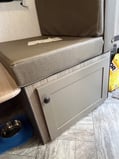
2. Access from Aisle
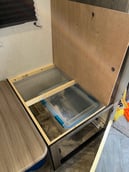
If you want a minimalistic look and aren’t interested in fully altering the structure of your dinette, you can add a door on the aisle side for easy access without having to lift the seat cushion. I found totes from Walmart that fit perfectly in the storage area. They easily slide out and by installing an edge protector, the bench does not get damaged
Benefits:
A simple and low-impact solution that doesn't require major modifications to the entire seat.
The storage access is discreet and blends in seamlessly with the dinette's design.
Can be a great option for hidden or infrequently used items.


Steps:
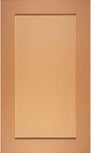
Prepare the doors: Sand rough edges, if there are any. Clean off any excess dust with a tack cloth. Paint all sides of the door with primer. Lightly sand when dry. Paint two coats of paint, lightly sanding in between coats. Note: Make sure you give the paint time to cure before handling and installing the doors. Follow the directions from the paint manufacturer for drying times.
Cut a hole in the bench panel: Using an oscillating multi tool with a plunge-cut saw blade, cut a section of the panel out, making it flush with the interior studs on all four sides. Sand the edges. To keep down cost and to make it simple, I just added duct tape to the edges. This also protects the edges without having to worry about chipped paint and can be replaced without a problem when there is sign of wear.
Locate hinges: Center the door on the hole and mark the hinge locations. Match the hinge locations to the adjacent “basement” door.
Install hinges: Install the hinges on the door first. Then have someone hold the door in the open position so that you can attach the hinges to the bench. Note: Predrill the holes with a bit that is smaller than the screws.
Install cabinet latch: Predrill all holes, smaller than the diameter of the screws. Attach the latch to the door and close the door. Attach the double roller catch. From above, locate the holes on the double roller catch. Open the door, predrill holes, install double roller catch.
Install knob: After locating the desired location for the knob, drill a hole. Attach knob.
Install edge protector on bottom edge: Cut protector to size and install with nail gun
Materials:
Doors - 2: 20” wide, 14” high. The most budget friendly doors that I found were on Amazon.
Paint: Benjamin Moore (BM) Advance, satin finish. I color matched the paint to match the other doors in the trailer. The best color that I found was from Sherwin Williams. But based on what I learned in my career as an interior architect, I prefer BM for interior applications. I had the paint store color match to Griffin #SW7026.
Hinges - 4: Purchased directly from Sunset Park RV to match existing (parts@sunsettrailers.com)
Knobs - 2: Purchased directly from Sunset Park RV to match existing (parts@sunsettrailers.com)
Cabinet Latch - 2: Found ones on Amazon to match existing
Duct tape
Edge Protector: Obtained from manufacturer during the rally in Shipshewana


Good luck and have fun!
If you decide to purchase any of these items, please do so through my affiliate links by clicking on the item photo. This helps you and me. Amazon extends a small percentage to me with no cost to you. And, you get vetted products without having to take the time do the research. Thank you for your support.